


Sshire
Well-Known Member
- Joined
- Jun 29, 2011
- Messages
- 936
- Reaction score
- 259
With about six months of machining "experience" (See my Engine made on a mill) I went to Cabin Fever and was tremendously impressed with the astounding craftsmanship.
I took out my little engine and then Dave (dreeves) and Scott (Cheepo45), sitting on either side of me started putting engines on the table. Lots of engines. Then Tin Falcon puts up the HMEM banner and more of his engines appear.
Since no one laughed uncontrollably at my little wobbler, I was committed (or should be) to going home and making engines.
The real kick starter was finding ArnoldB's Grasshopper build. So step by step, I followed Arnold's build and a month later finished the Grasshopper. Many things on the drawings which made no sense to a newbie, were made clear by Arnold. After running it in, it can chug along on 2.5-3 psi all day. Thanks Arnold!! I have that one documented and will write up the build log.
Now I've started my engine #3, Elmer's #13. The Open Column Twin with Poppet Valves.
Arnold to the rescue again when I was not understanding how to layout the spiral cams. Hey Arnold, if you come to the States, you've got a dinner and some fine Scottish produce waiting along with the Grand Tour of Philadelphia.
What follows is two days in the shop.
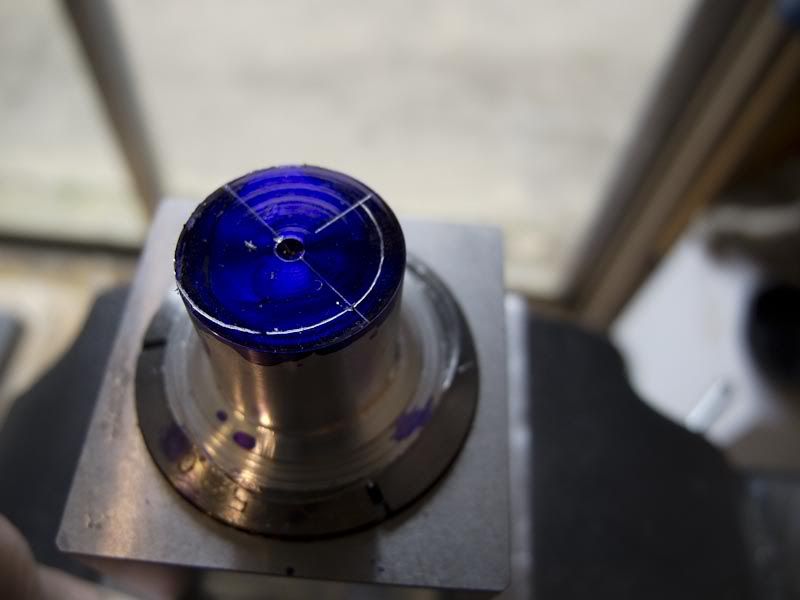
The cams marked out.
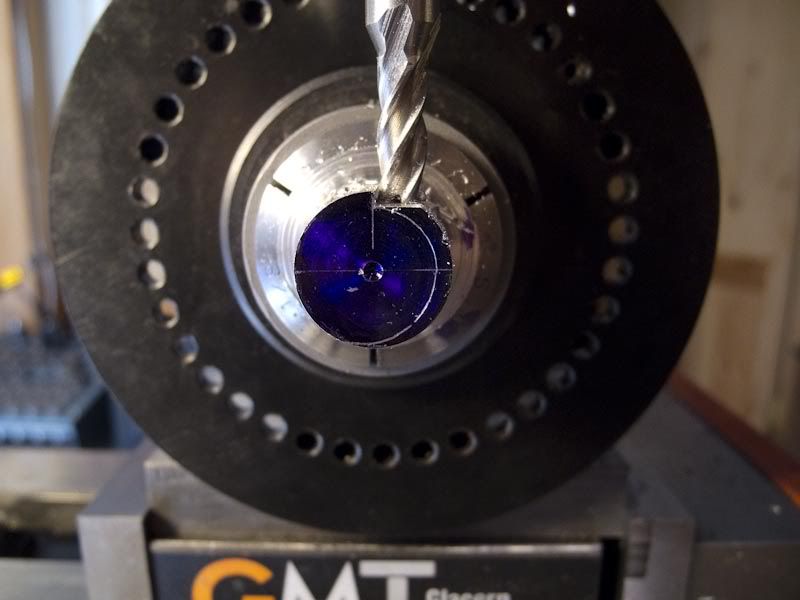
The 6061 rod went into a 5C collet and then into the indexer.(Not counting the evening spent milling the base of the Phase II indexer so that I could get it square in the vise. Luckily the front of the base was at 90 degrees to the centerline of the spindle so I had a datum surface to start)
Same setting for the end mill for the first 90 degrees and then moving it out for each half degree, rinse and repeat 32 times.

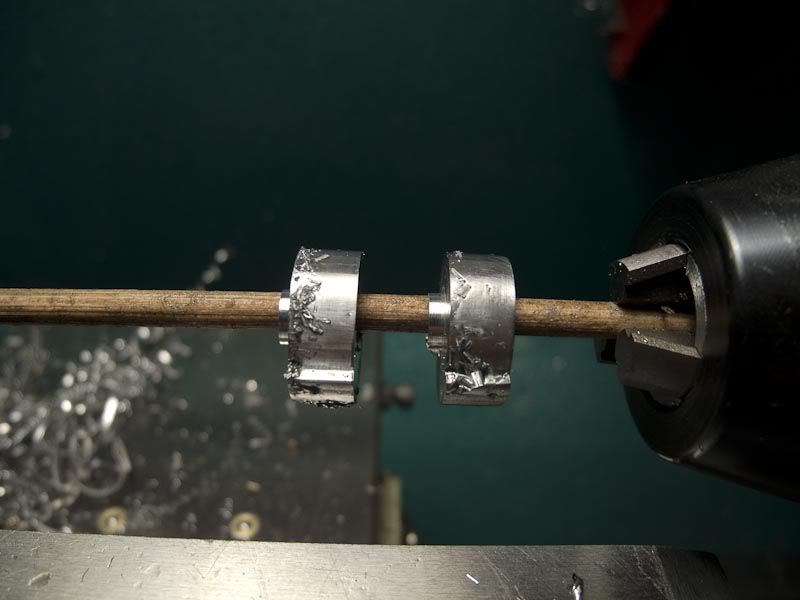
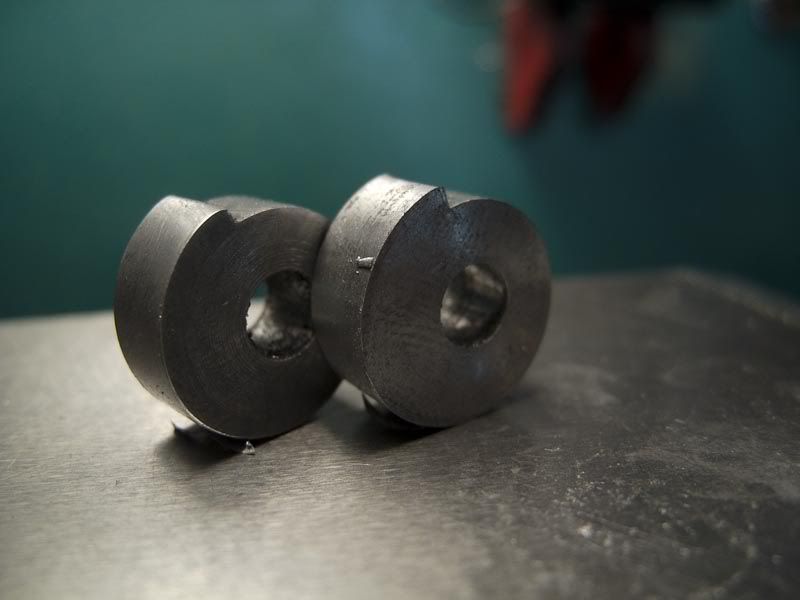
Move the part in the collet to the lathe and parted two cams off.

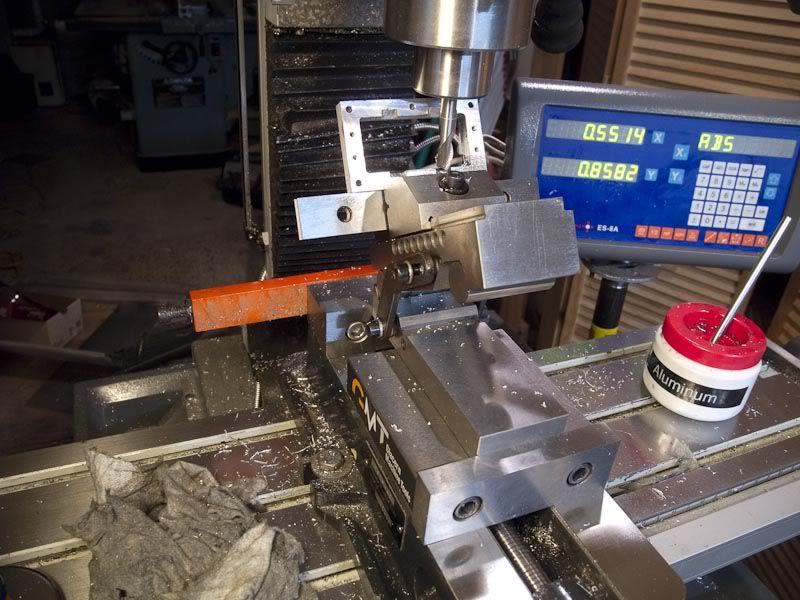
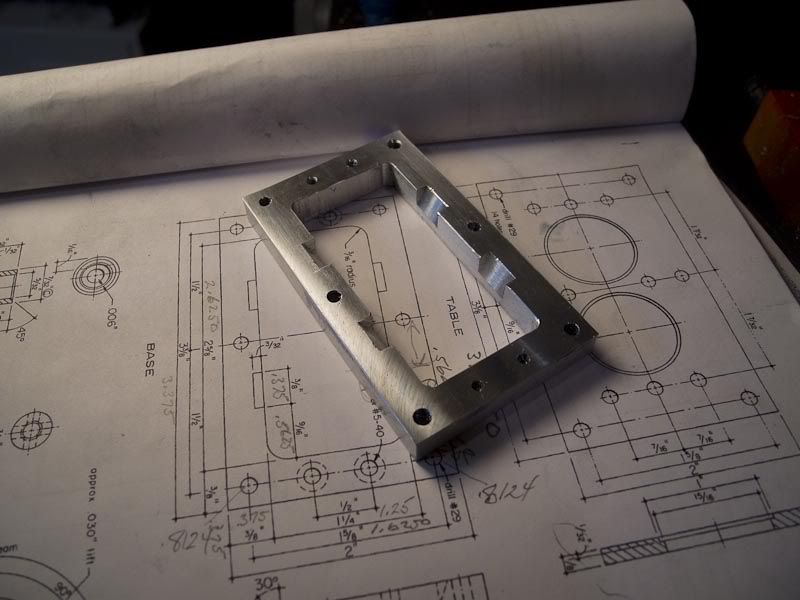
On to the base. Milled to size and then face milled both sides.
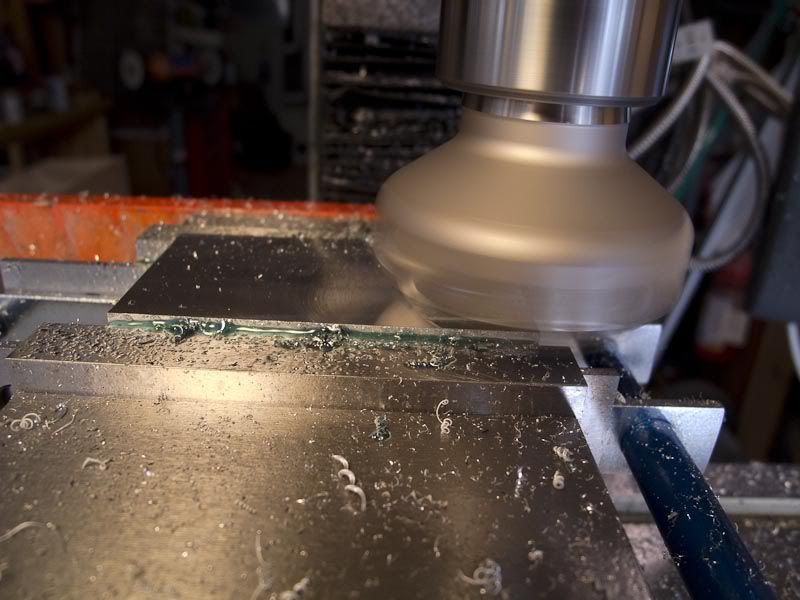
After milling the opening (lots of coolant made a big difference. The Grasshopper steam chest (version 1) looked like I had chewed it out of the 6061. I am learning every day), I listed X and Y points for the holes , and moved from one to the other using the DRO.
There are 4 relief areas for the crankshaft. I started to get out the Jo blocks to set up the sine vise and then remembered the Harbor Freight angle gauge the I picked up last week when I was driving past HF (didn't need a thing, but can't resist)
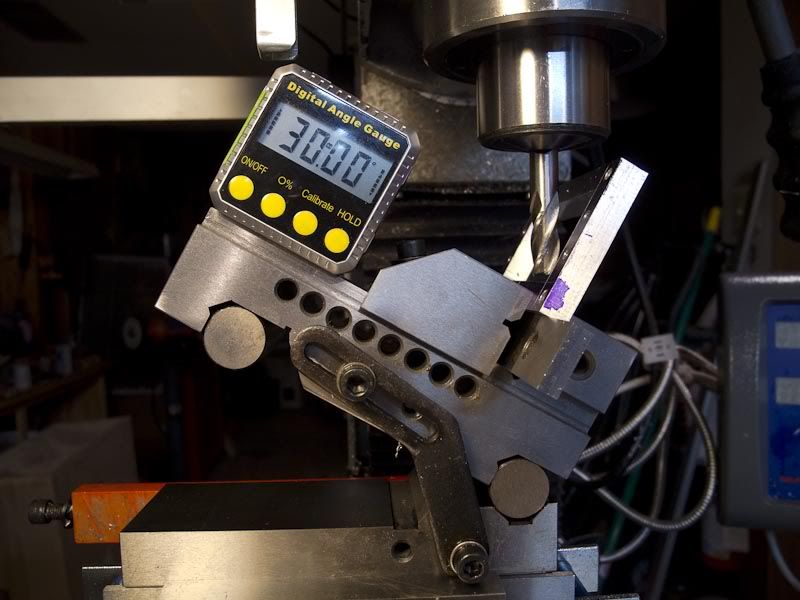
The angle specified was 30 degrees and since the little relief areas can't be that critical I went with the angle gauge on the sine vise. Worked perfectly and it might even be 30 degrees.
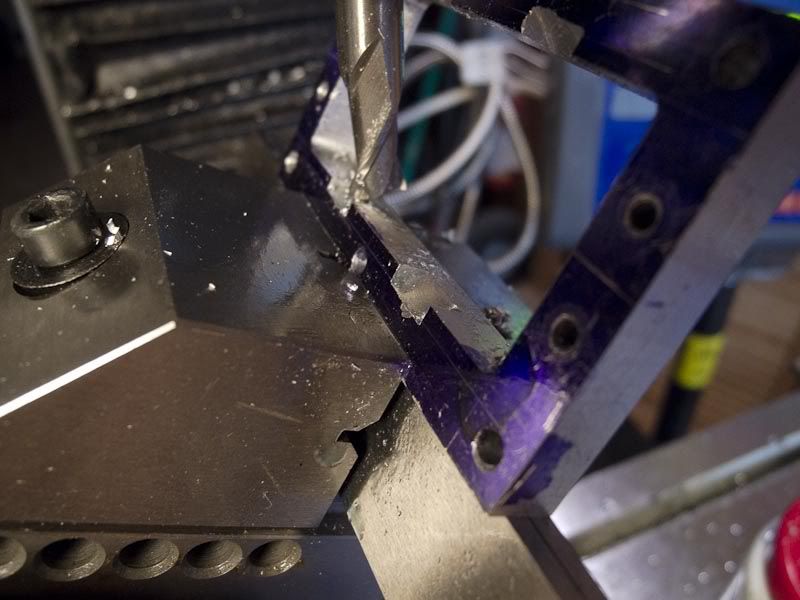
Calling this part finished.
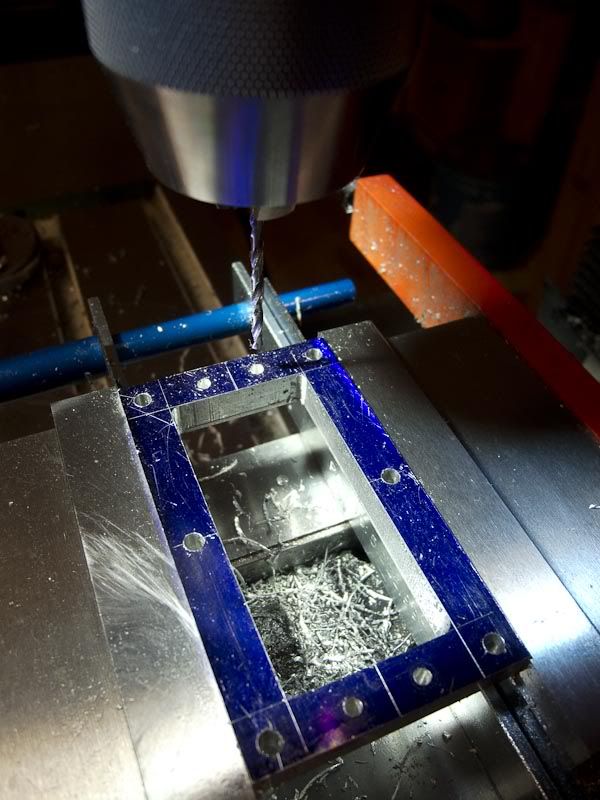
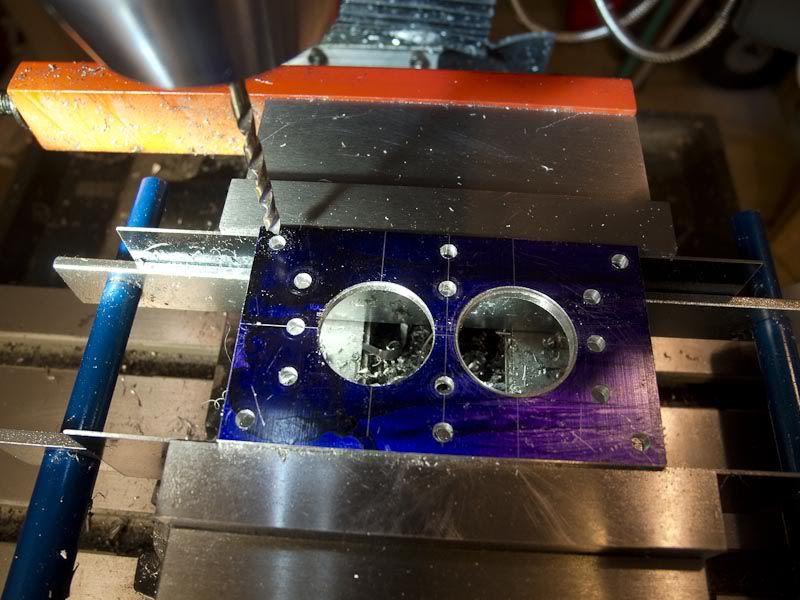
Next part has 2 - 15/16" holes. Did some layout just as a sanity check but used the DRO for positioning. Have to really stop and think with the Criterion boring head because when it is advanced .001, it really does increase the diameter by .001 unlike my lathe which requires me to remember that advancing by .001 actually increases the bore diameter by .002.
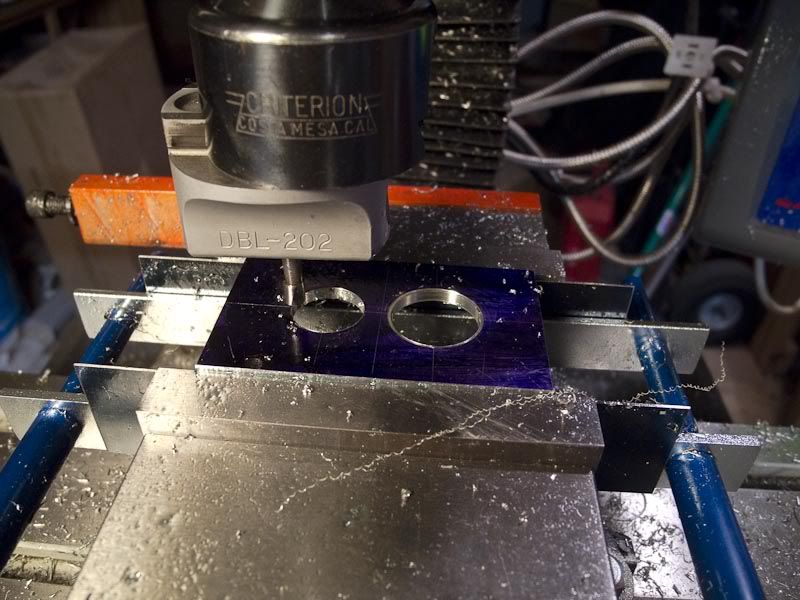
And then drilling 14 holes. Just hitting numbers on the DRO and done.

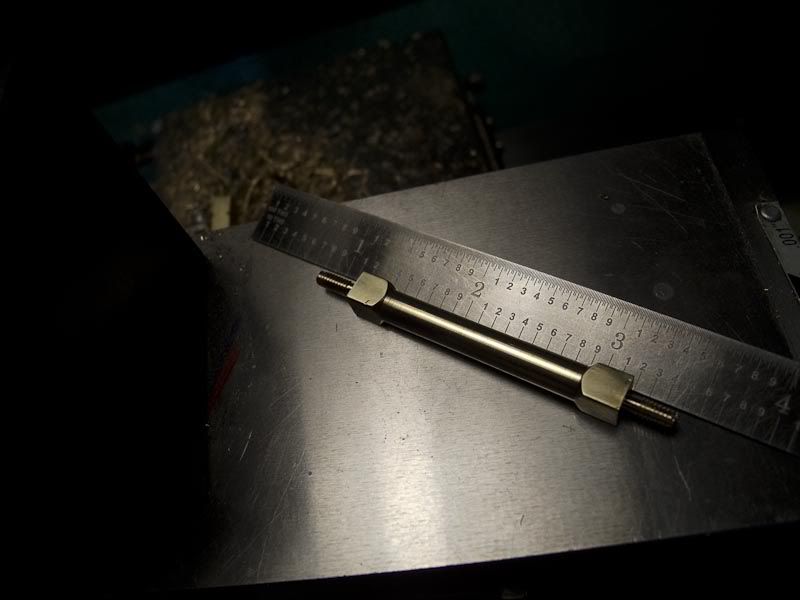
Looking at the next part, the columns, I thought that I would try to make them a bit different from the plans. Dimensions are the same. After figuring out a good sequence for turning them I tried a prototype.
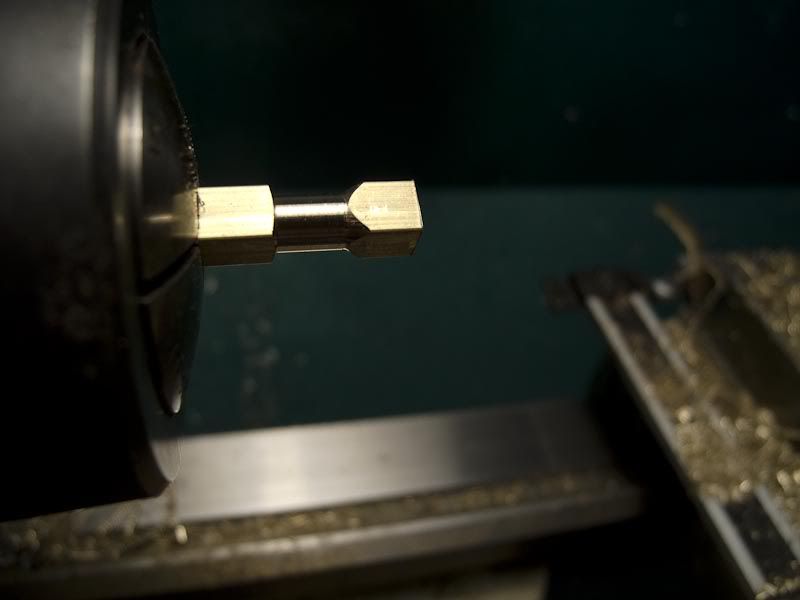
This is not a recommended result.
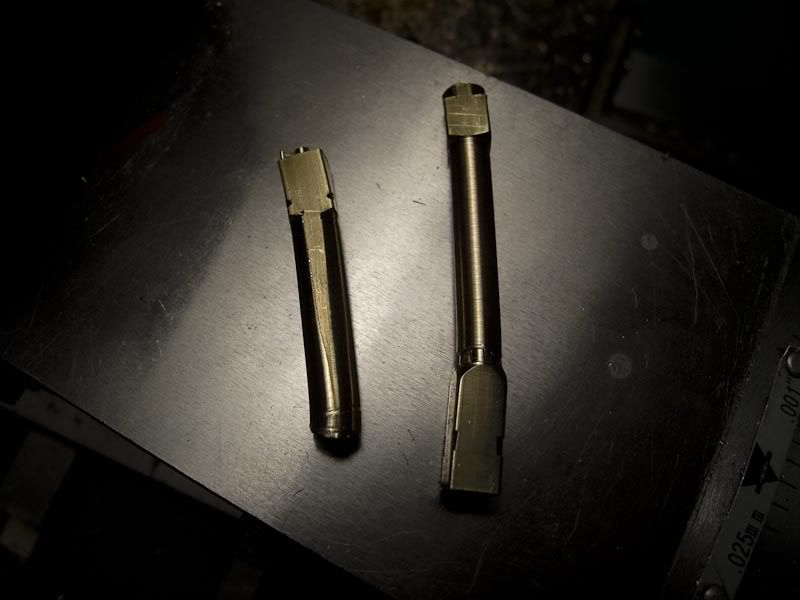
This is much more satisfactory once I had the correct sequence of operations.
So end of the weekend, but I should get a few evenings in the shop this week.
Stay tuned and please, If you see me doing something stupid or the wrong way or you have a better method, let me know. Most of what I do is being done for the first time.
Best
Stan
I took out my little engine and then Dave (dreeves) and Scott (Cheepo45), sitting on either side of me started putting engines on the table. Lots of engines. Then Tin Falcon puts up the HMEM banner and more of his engines appear.
Since no one laughed uncontrollably at my little wobbler, I was committed (or should be) to going home and making engines.
The real kick starter was finding ArnoldB's Grasshopper build. So step by step, I followed Arnold's build and a month later finished the Grasshopper. Many things on the drawings which made no sense to a newbie, were made clear by Arnold. After running it in, it can chug along on 2.5-3 psi all day. Thanks Arnold!! I have that one documented and will write up the build log.
Now I've started my engine #3, Elmer's #13. The Open Column Twin with Poppet Valves.
Arnold to the rescue again when I was not understanding how to layout the spiral cams. Hey Arnold, if you come to the States, you've got a dinner and some fine Scottish produce waiting along with the Grand Tour of Philadelphia.
What follows is two days in the shop.
The cams marked out.
The 6061 rod went into a 5C collet and then into the indexer.(Not counting the evening spent milling the base of the Phase II indexer so that I could get it square in the vise. Luckily the front of the base was at 90 degrees to the centerline of the spindle so I had a datum surface to start)
Same setting for the end mill for the first 90 degrees and then moving it out for each half degree, rinse and repeat 32 times.
Move the part in the collet to the lathe and parted two cams off.
On to the base. Milled to size and then face milled both sides.
After milling the opening (lots of coolant made a big difference. The Grasshopper steam chest (version 1) looked like I had chewed it out of the 6061. I am learning every day), I listed X and Y points for the holes , and moved from one to the other using the DRO.
There are 4 relief areas for the crankshaft. I started to get out the Jo blocks to set up the sine vise and then remembered the Harbor Freight angle gauge the I picked up last week when I was driving past HF (didn't need a thing, but can't resist)
The angle specified was 30 degrees and since the little relief areas can't be that critical I went with the angle gauge on the sine vise. Worked perfectly and it might even be 30 degrees.
Calling this part finished.
Next part has 2 - 15/16" holes. Did some layout just as a sanity check but used the DRO for positioning. Have to really stop and think with the Criterion boring head because when it is advanced .001, it really does increase the diameter by .001 unlike my lathe which requires me to remember that advancing by .001 actually increases the bore diameter by .002.
And then drilling 14 holes. Just hitting numbers on the DRO and done.
Looking at the next part, the columns, I thought that I would try to make them a bit different from the plans. Dimensions are the same. After figuring out a good sequence for turning them I tried a prototype.
This is not a recommended result.
This is much more satisfactory once I had the correct sequence of operations.
So end of the weekend, but I should get a few evenings in the shop this week.
Stay tuned and please, If you see me doing something stupid or the wrong way or you have a better method, let me know. Most of what I do is being done for the first time.
Best
Stan
")