First Engine Elmer's #29

Home Model Engine Machinist Forum

Help Support Home Model Engine Machinist Forum:

This site may earn a commission from merchant affiliate links, including eBay, Amazon, and others.

RCGUY

Well-Known Member
Joined
Dec 10, 2011
Messages
63
Reaction score
21
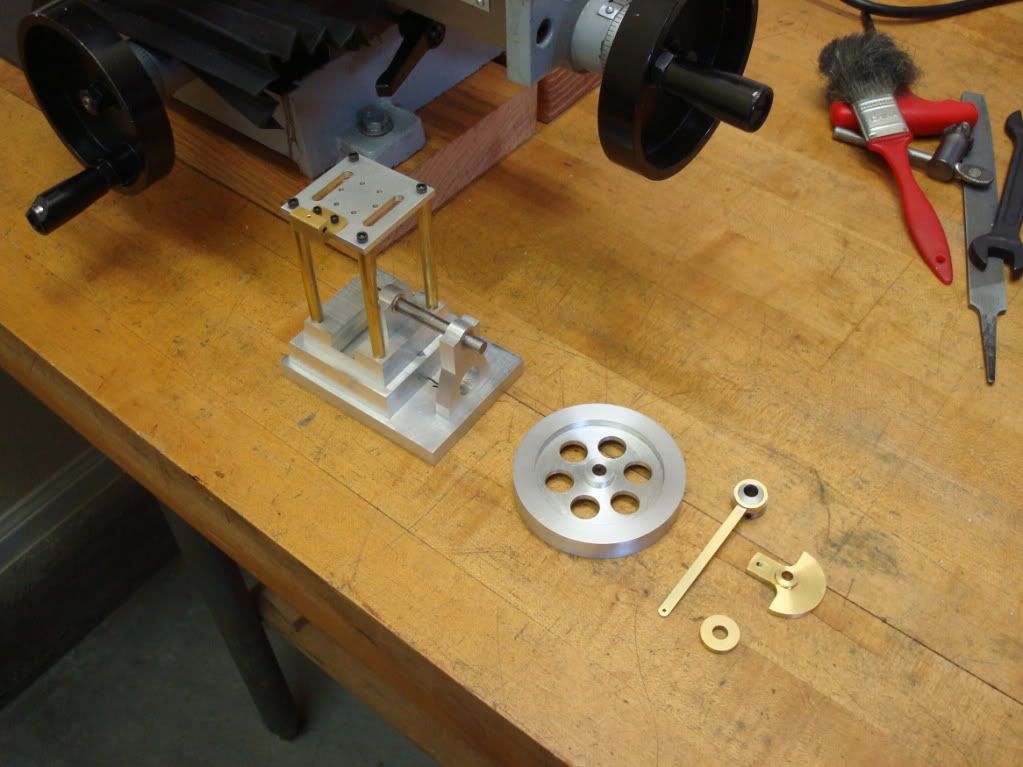
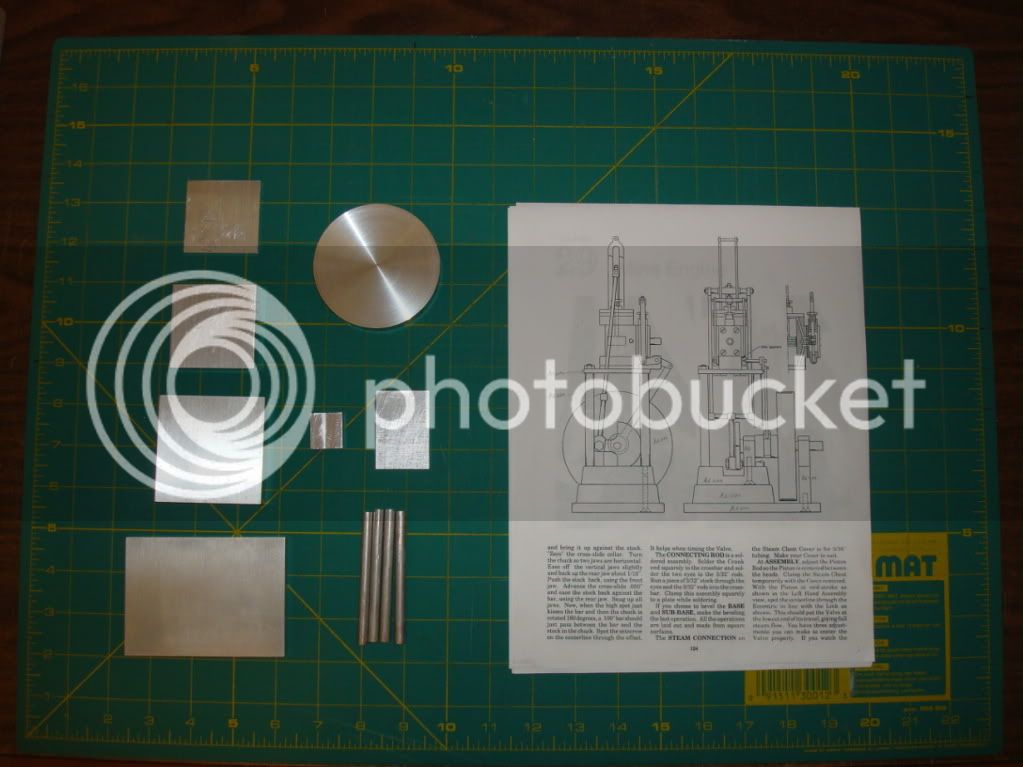
I have used a small lathe for the last 2 years and have just purchased a milling machine (Micro-Lux R8). If all goes well with this engine I hope to build a Twin Cylinder Marine Engine for an RC Boat. I plan on building the Mine Engine according to the plans, however I did make the base plate a little wider and higher. I will most likely have lots of questions, so please add you advice.

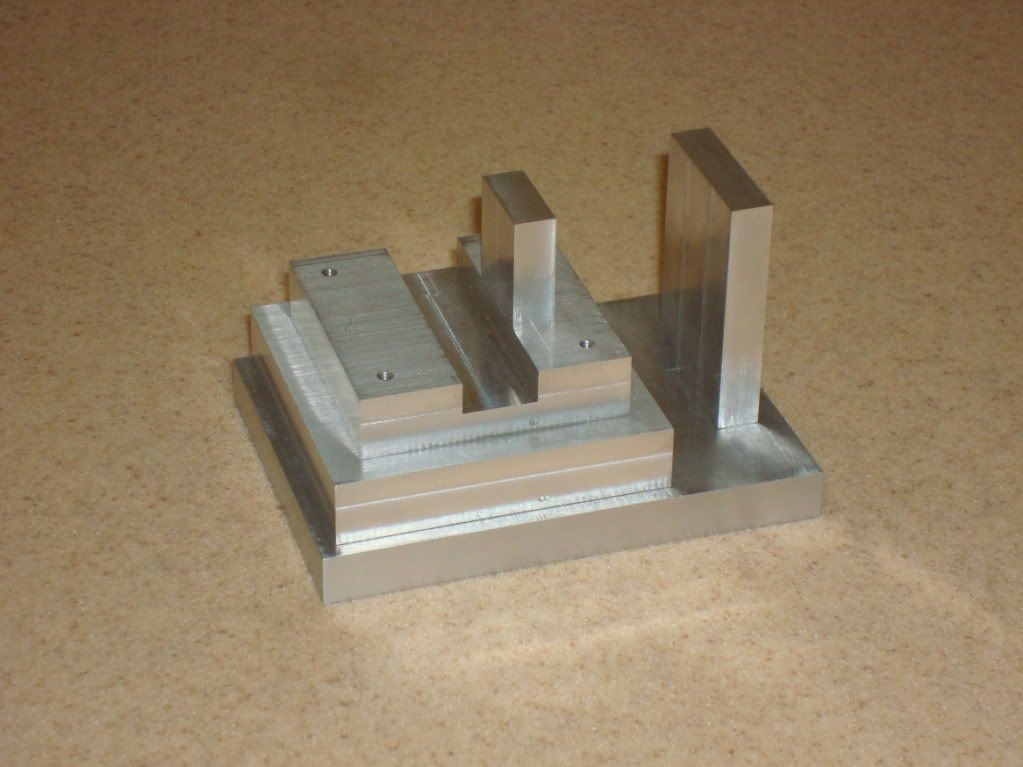
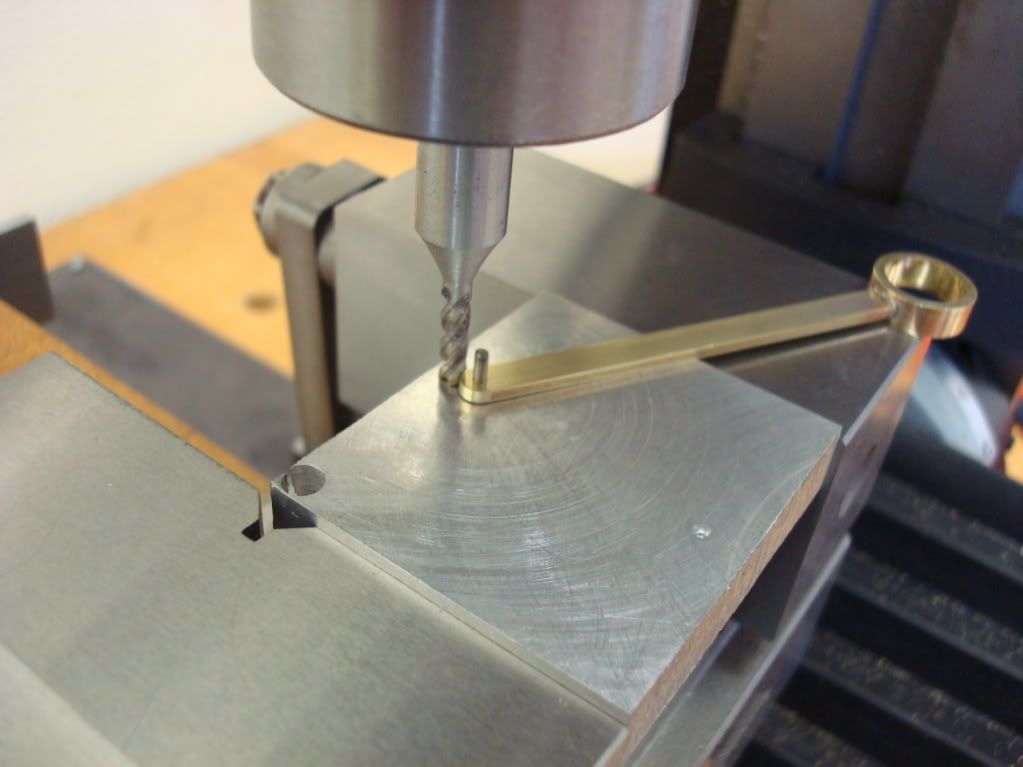
I have started at the bottom and will work my way up. All the base plates are milled to size.

Ed

1.jpg

 
Measure twice, cut once. :)
 
I see you use (nearly) the same method as me. But I usually have to scrap the part and start over, as I can't weld worth a damn, either.
 
Metal Butcher,

I found your build thread a couple of weeks ago and have been studying it. Your build is what inspired me to build the #29. You have posted some excellent how to pictures.

RCGUY
 
I have all the base plates and bearing blocks drilled, tapped and assembled with 4-40 screws. My next step is to line bore the bearing blocks for 3/8" bushings. I need to think how I will mount this in the vice and back up the bearing blocs while assembled, any advice?

Ed

2.jpg
 
Looks like a great start Ed!!!!

Looking forward to following you on your journey!

Andrew
 
Since the last post I profiled the bearing blocks and bored them out for bushings that still need to be trimmed. I was going to make the four posts out of aluminum but changed them to brass, they are drilled and tapped to 4-40. The 1/4" shaft went right into the bushings and spun freely (I was amazed). Today I milled the table and tapped the 2 holes for 2-56 screws. Thanks to Marv's boltcirc program I was able to drill the holes correctly.

Ed

4.jpg


5.jpg
 
I cut the profile on the two upper base plates using my table saw. I used an 80 tooth carbide blade. The profile is 7/16" less at the top which works out to 7 degrees. The 3 base pieces will be sanded smooth and painted. I also made the flywheel, crank shaft and crank, the eccentric strap and eccentric along with the spacer.

7.jpg


8.jpg
 
When I cut the the rounded end on the eccentric strap, I cut it by lowering the end mill by .003" at a time. Is this the way it should be done or do you lower the end mill all the way down and cut it in one shot?

Ed

9.jpg
 
I would have grabbed my trusty file and used a little bit of elbow grease to round the end. I think the way you went about it is just fine. Taking small bites lowers the chances of the tool grabbing the work piece. Better safe than sorry.
 
Great to see the progress you have made over the last couple of months. Looks like it's all going together nicely and will make a fine looking engine!!

Bill
 
I use the same technique for rounding over. Unless the part is very thick, I engage the full thickness of the part with the endmill. I found it mandatory to provide some sort of stop mechanism to limit the movement of the part when it's (inevitably) grabbed by the tool. You can see pictures and a description of my crude fixture at:

http://www.schsm.com/html/marv_klotz_38.html
 
Marv,

Thanks for posting the picture of your fixture. It looks like a safer way to round over the ends of links. Is the rotary file a Dremel tool?

Ed
 
Ed,

This is what I did with my mine engine. Just a little different from the plans.

The first page has a few piccies missing because at one time I lost all my pictures on Photobucket, but the rest of them are OK. I still have the pics on my computer, but no way of getting them into that original post.

http://www.homemodelenginemachinist.com/index.php?topic=389.0


Don't be afraid of changing things, Elmer's engines are perfect for doing such things. Even a bit of rounding over, drilling a few lightening holes or maybe some column fluting can make your engine totally unique.


John
 
John,

I have looked at your build of Elmer's # 29 and I must say it is a beautiful version of his engine. Since this is my very first build I decided at the start to follow the plans to the letter. I have worked with wood for many years. This has been a real challenge and learning curve for me working with metal. Plus I am still in the process of buying the tools I need to complete the build. I had to make 3 flywheels to get one that ran true. On the plus side I am ending up with a nice box of scrap metal for future projects.

Ed
 
Don't worry Ed, this isn't a competition.

Just do what you think needs doing, and more than anything else, enjoy it.
Use other peoples posts to help you solve those little problems you WILL come across, but there is no need to follow them religiously, there is always more than one way to solve a problem.

We all had to start somewhere, and don't worry about making scrap. I still do, but not as much as I used to, it does get better over time.

BTW, even though I can do metal murdering fairly well, I bet you could knock spots off my woodworking, so we all have something to teach each other.


John
 
Back
Top