Welcome to my world!!! I went through absolute Hell with my Kerzel engine trying to get the valves to seal. As soon as I got the valves to seal, the engine would run. Go have a look at my post about building the Kerzel hit and miss engine and you may get a few tips on what I went through to arive at a running engine.----brian
You are using an out of date browser. It may not display this or other websites correctly.
You should upgrade or use an alternative browser.
You should upgrade or use an alternative browser.
Finishing the Phil Duclos Odds and Ends
- Thread starter cl350rr
- Start date

Help Support Home Model Engine Machinist Forum:
This site may earn a commission from merchant affiliate
links, including eBay, Amazon, and others.
cl350rr
Well-Known Member
- Joined
- Jun 23, 2009
- Messages
- 198
- Reaction score
- 6
yup... well, there's part of the problem...
I wish I had enough skill to capture this with a camera so a description will have to do, try to picture in your mind....
I finally got some time to make the fixtures to make a new set of rings by the no-heat method that Bill Lindsey presented in this thread:
http://www.homemodelenginemachinist.com/index.php?topic=6014.msg103347#msg103347
thanks again Bill
I pulled the old rings out to measure them and put them in my pocket. When I got to work today I realized they were still in my pocket so I took them out to show a couple of folks, that's when I noticed the patern on them.
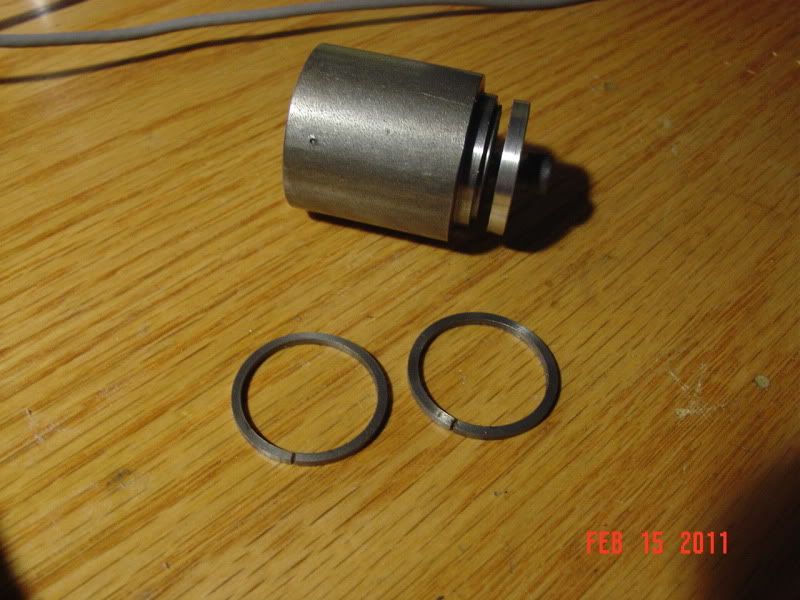
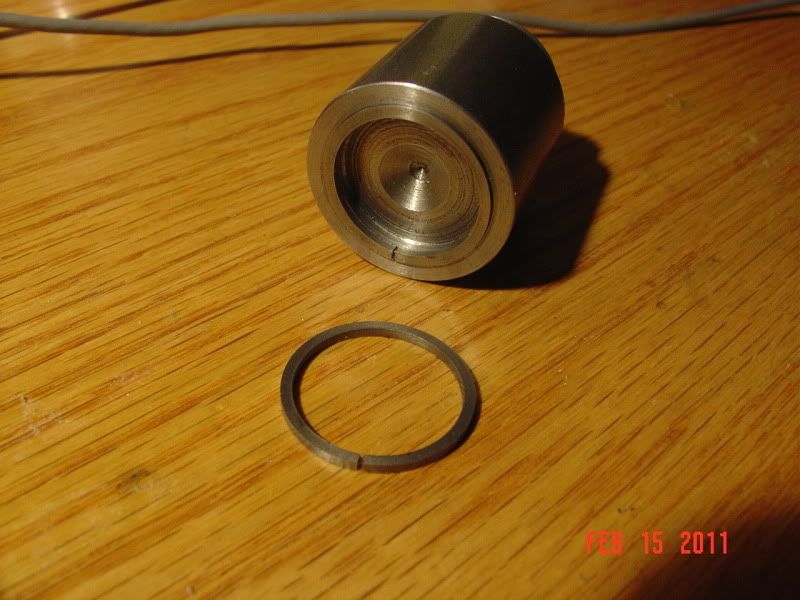
They have a nice shiney contact area over about 50% of the ring surface. there is a small area right at the gap and a larger area directly across from the gapwhere wall pressure has been insufficient to shine the ring surface. in the non contact areas, the original machining marks can clearly be seen. I believe that the way they were made was that they were held open and heat treated, leading to the out of round shape they currently have.
so, now if the new snow will melt off by this weekend, I may have a test run with a new set of rings...
cl350rr
Well-Known Member
- Joined
- Jun 23, 2009
- Messages
- 198
- Reaction score
- 6
Rings, my first attempt: outside jig

inside jig:

finishe rings: note the gap

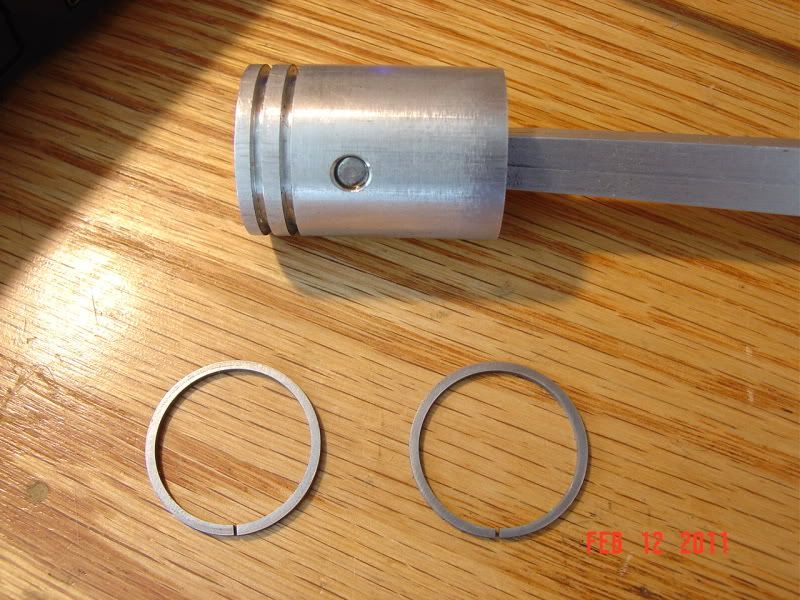
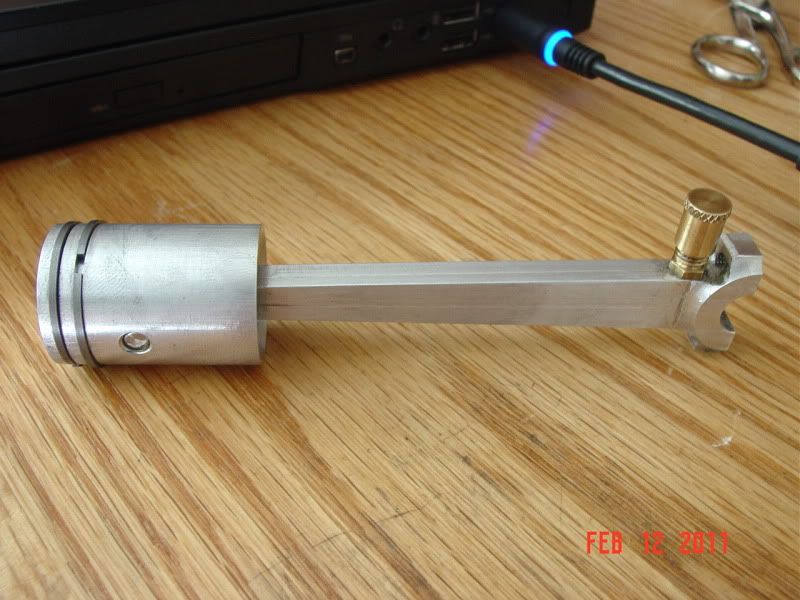
Installed on the piston: again note the gap

I cut 4 raw rings from the cast iron bar. I wound up with two usable rings. both of the rings that did not pass QA were bad due to my machining, not breakage. I got both of the rings on, off and on the piston without breaking one. finished and installed in the bore they have a gap of a few thousanths.

inside jig:

finishe rings: note the gap

Installed on the piston: again note the gap

I cut 4 raw rings from the cast iron bar. I wound up with two usable rings. both of the rings that did not pass QA were bad due to my machining, not breakage. I got both of the rings on, off and on the piston without breaking one. finished and installed in the bore they have a gap of a few thousanths.
cl350rr
Well-Known Member
- Joined
- Jun 23, 2009
- Messages
- 198
- Reaction score
- 6
So... I made the new rings. installed them and gave the engine a try. the compression is better but probably not what it needs to be to run. I spun it over a bit with some kerosene in the cylinder to help seat the rings and it improved some.
I have arrived at the conclusion that I am going to have to make a reliable set of points for this thing before I go any farther with the compression problem. I can get a few dozen turns out of the steel points before they carbon over and stop firing...
I will post a pic of the solution when I find one
Randel
doc1955
Gone
- Joined
- Aug 26, 2009
- Messages
- 1,261
- Reaction score
- 163
I built that engine and had the same trouble with the points. What I did to solve it was to take the platinum pads of a set of points and silver soldered in place onto the steel hacksaw blade and the screw. They have worked ever since.
cl350rr
Well-Known Member
- Joined
- Jun 23, 2009
- Messages
- 198
- Reaction score
- 6
Thanks Doc, that's what I've been thinking.
so far I have looked down a couple of possible paths:
1. ordinary light switches... they cycle hundreds of thousands of times, never seen one fail due to ruined contacts and they are cheap ;D. opened one up from the scrap box, it had clearly been in service for an extended period of time... contacts looked new (and small, maybe 3/32 dia). turns out they are copper base probably surfaced with nickle. seems like an easy solution because they could be pressed in and staked from the back side without affecting the heat treatment of the hacksaw blade but concerned about durability as alot more amperage will be trying to cause arcs than what is seen in a light circuit.
2. opened a 220v contactor, huge (3/8) diameter contacts, same material...
3. went to U-rench-it to pick a couple of cheap sets of points to fiddle with... guess what, 300-400 cars, trucks, vans, suvs... one old Mercedes with points type ignition...
next thought, how do you remove a tungsten contact button that is welded to the steel frame of a set of automotive points?
Randel
I was advised to go to my local welding supplier and buy a platinum tig welding electrode and use two segments parted off from it. I didn't use that method, but it might work for you.---Brian
cl350rr
Well-Known Member
- Joined
- Jun 23, 2009
- Messages
- 198
- Reaction score
- 6
OK... an update and a couple of questions:
as I try to get this accumulation of metal parts in the shape of an engine to act like one :-\
I just finished the nicest set of rings yet (3d for me, 4th for this engine). beautiful things, pollished on all 4 surfaces, concentric, even thickness and width all around, slight chamfer on the id to eliminate binding in the bottom of the groove, very minimal side clearance, a .002in gap when in the bore... really magnificent... still insufficient compression ???
I am testing with the valve block removed to isolate the problem to the piston/cylinder/rings. I have come to the conclusion that the rings are not the issue. that leaves bore and piston... 2 questions from those who have fought this fite b4:
1. what bore surface prep is recommended; hone to a cross hatch or lap to a shine?
2. what piston to bore clearance should I be striving for with a 1" cast iron cylinder and an aluminum piston?
thanks for your help
Randel
Randal,
I made this engine a while ago. I also had problems making it run.
It would fire but not keep running. The problem turned out to be not enough suction on the fuel.
I made an extension piece for the air intake, and blocked it slightly.
It now runs much better.
I find a bit of 2 stroke oil in the feul also helps.
Regards
Tony
Similar threads
- Replies
- 0
- Views
- 191


