My 4" scale steamroller project

Home Model Engine Machinist Forum

Help Support Home Model Engine Machinist Forum:

This site may earn a commission from merchant affiliate links, including eBay, Amazon, and others.
Today, I want to talk a bit about visualization, adaptive re-use and reverse engineering.

Back when I sold model engine kits, I'd occasionally have old part built models, usually just the pieces without drawings. Guys would get annoyed because there were no prints, and even more upset if I'd say that any machinist worth his salt shouldn't NEED plans to finish them....

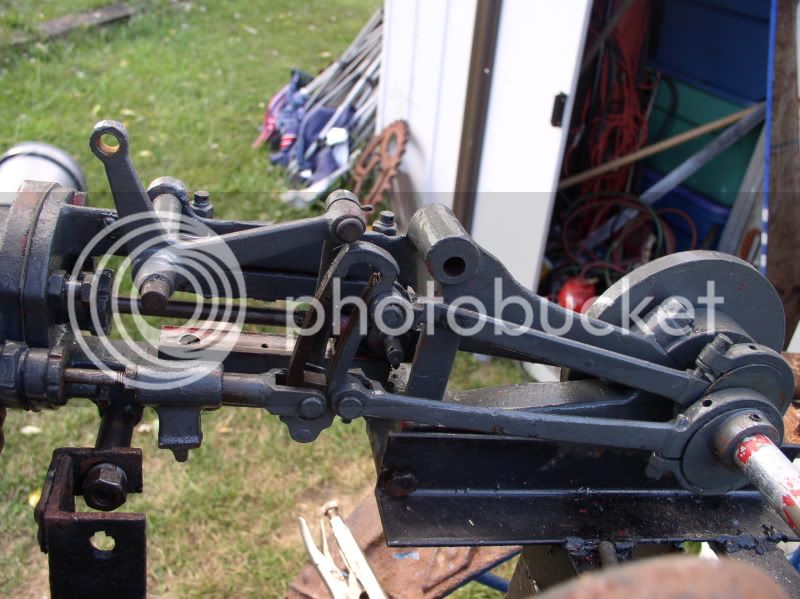
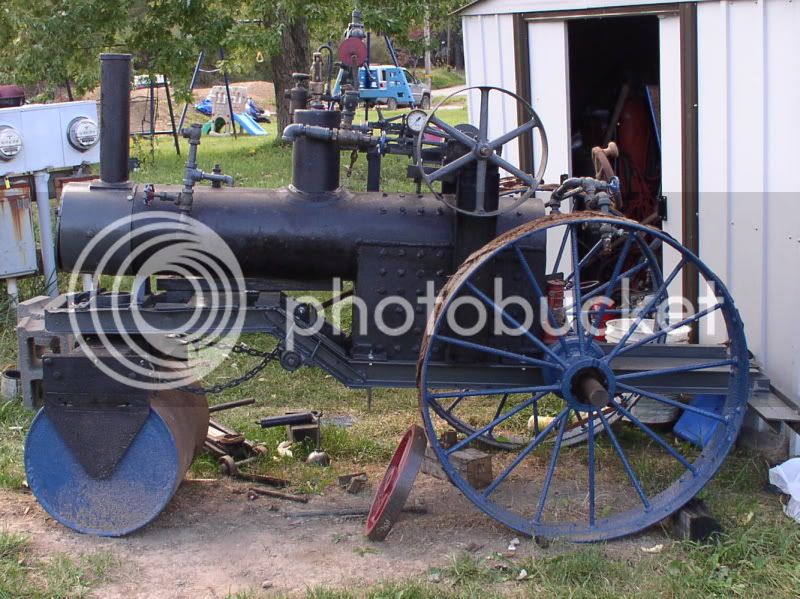
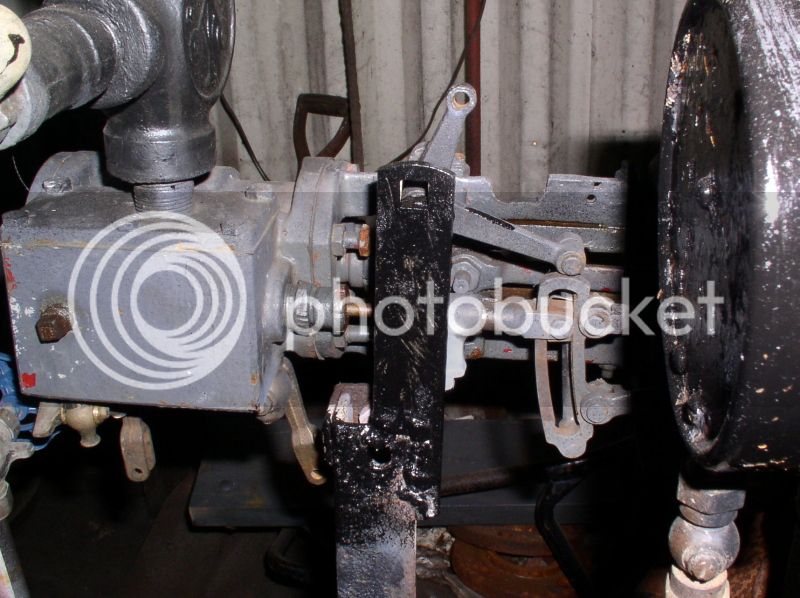
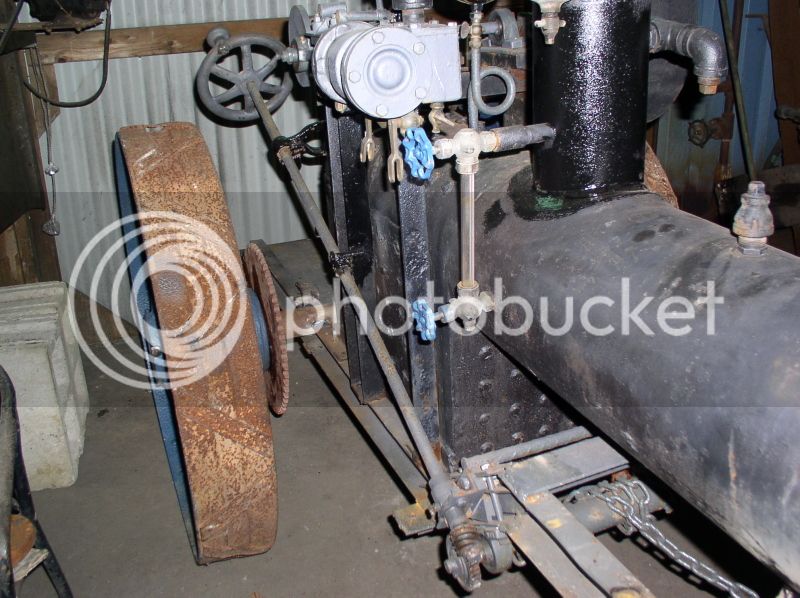
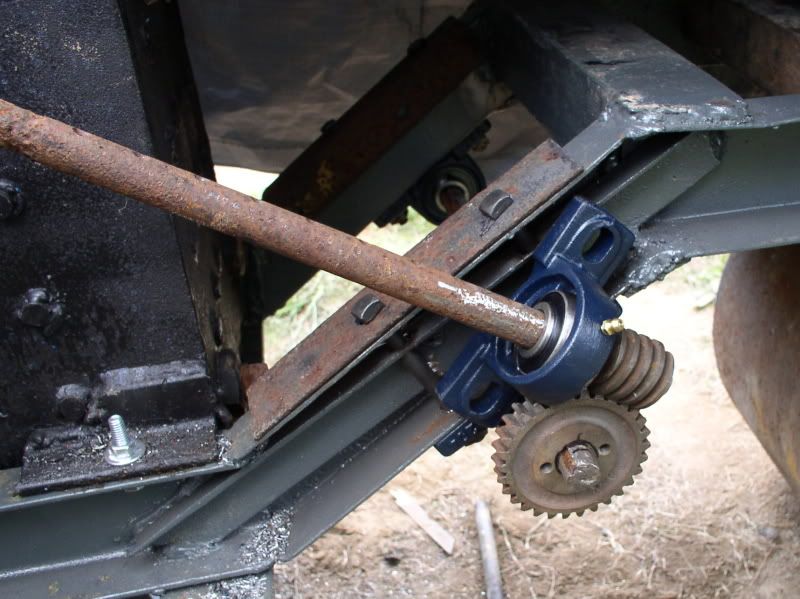
Today's project was to start putting together the steering gear on the roller. No plans, not even a sketch. From miscellaneous parts accumulated from many different places over the last DECADE.....
P9120006.jpg


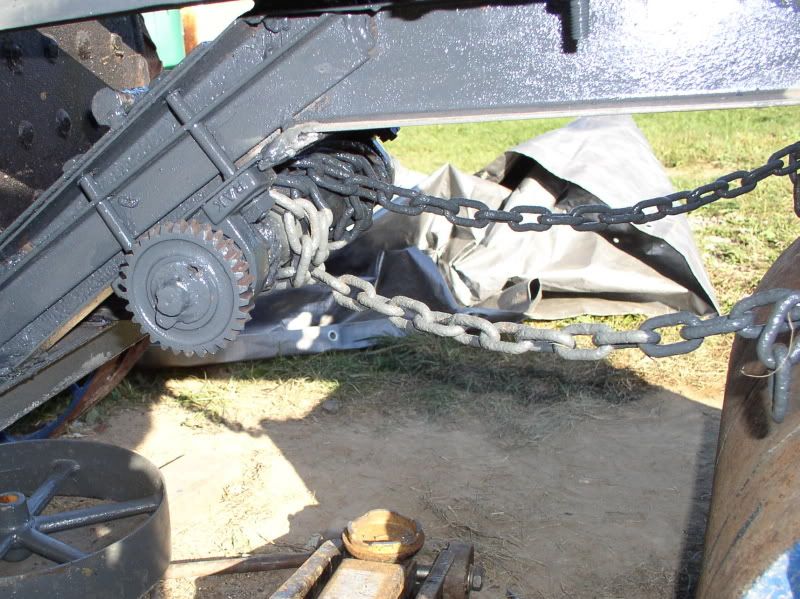
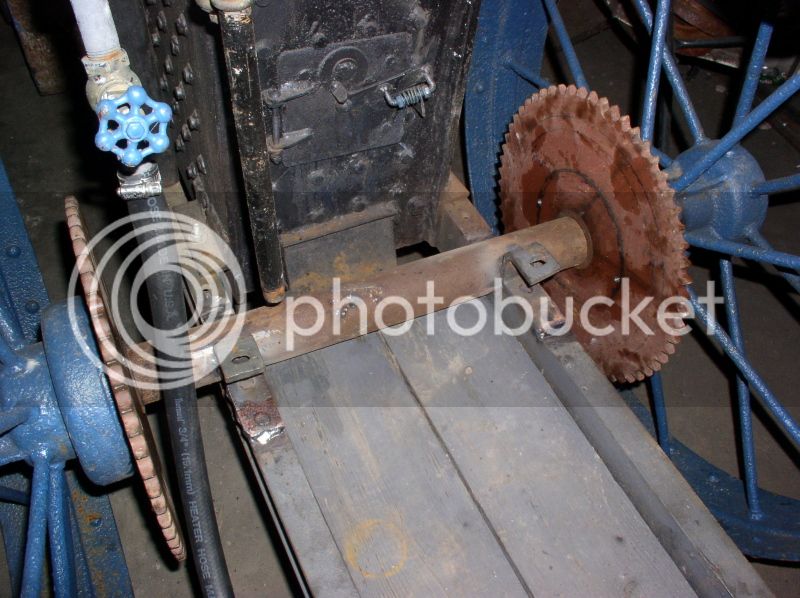
Visualizing how things might go together is a skill most people can learn. Thinking in 3 dimensions really isn't that much harder than reading a blueprint that somebody else drew -- by thinking in 3 dimensions.... mocking the parts up is one way to practice, sooner or later you can do it all in your head. I temporarily mocked the steering shaft up to see how long to cut it, and what size spacers and bolts I needed.
It's just being held in midair by a big clamp and a stray lever that was handy.
P9120003.jpg


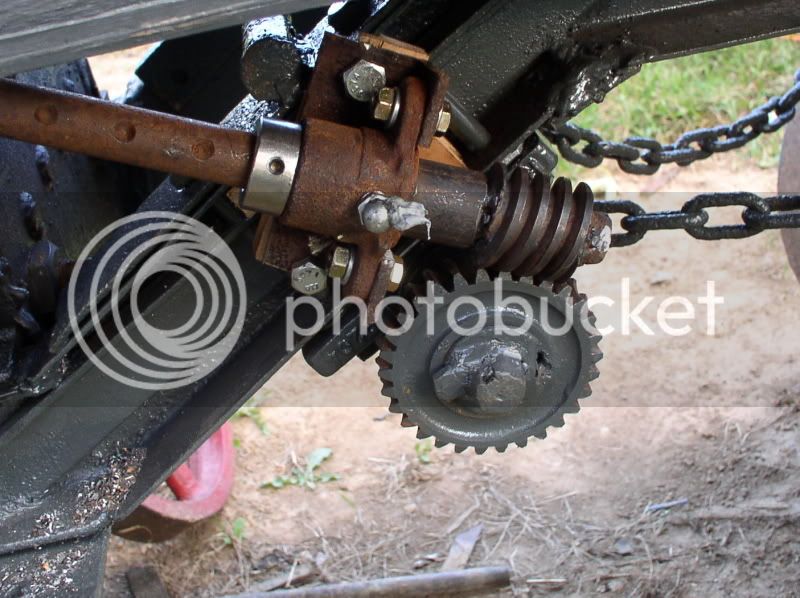
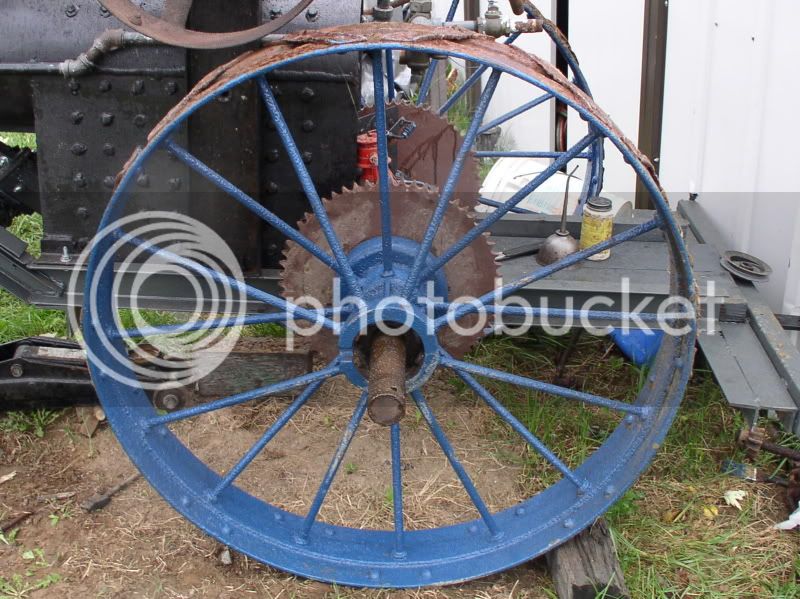
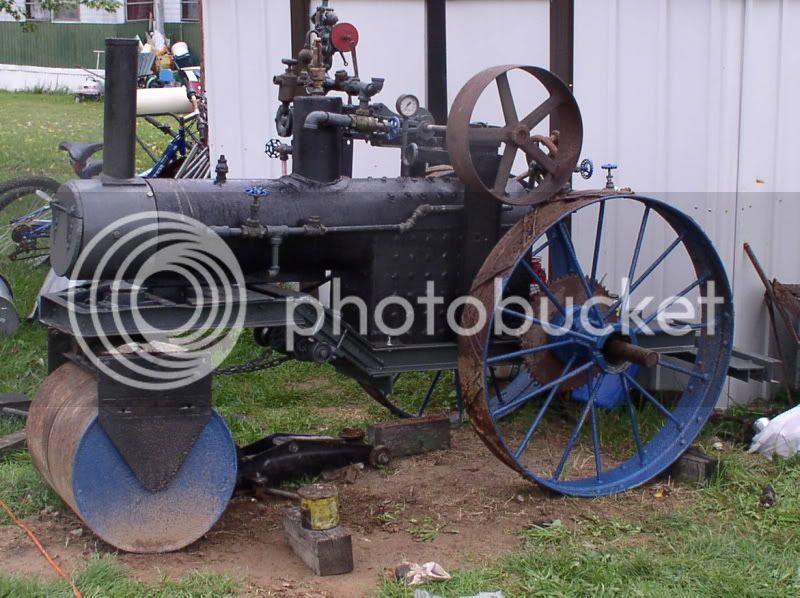
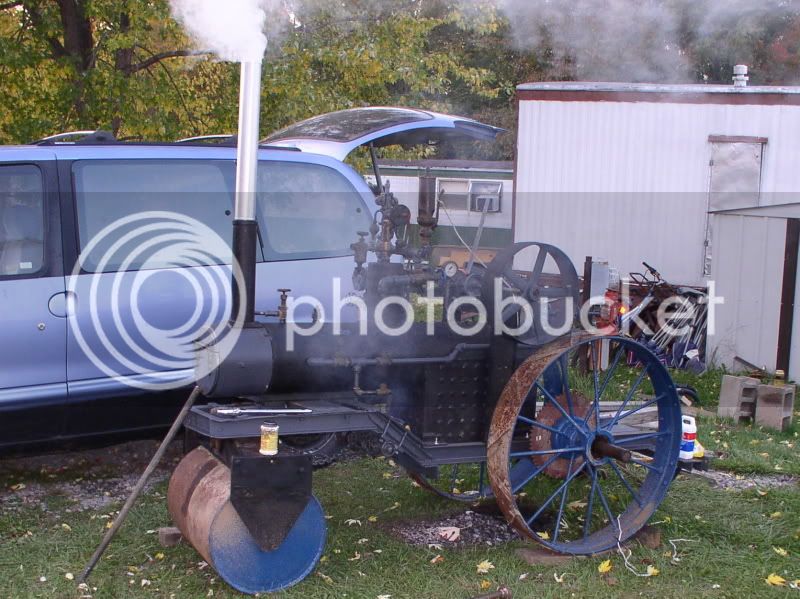
Many guys go through all sorts of contortions over model gears. Scratch hobbing exact scale gears from billet. Pouring over catalogs to get a perfect match from Boston Gear. I found this worm and gear at a flea market in a surplus vendor's bin for $10 or so. Then I reverse engineered everything else from there. These gears took 3/4" shafts, so while I was getting the spreader wheels I raided Wilbert's scrap pile for a couple stray chunks of that. Then I got some super cheap Chinese bearings off feebay.... and then made the rest to fit the frame.... the winding drum itself will be a bit of 1-1/2" pipe made to FIT the space. No drawings there, either - just a tape measure and a saw.
P9120001.jpg


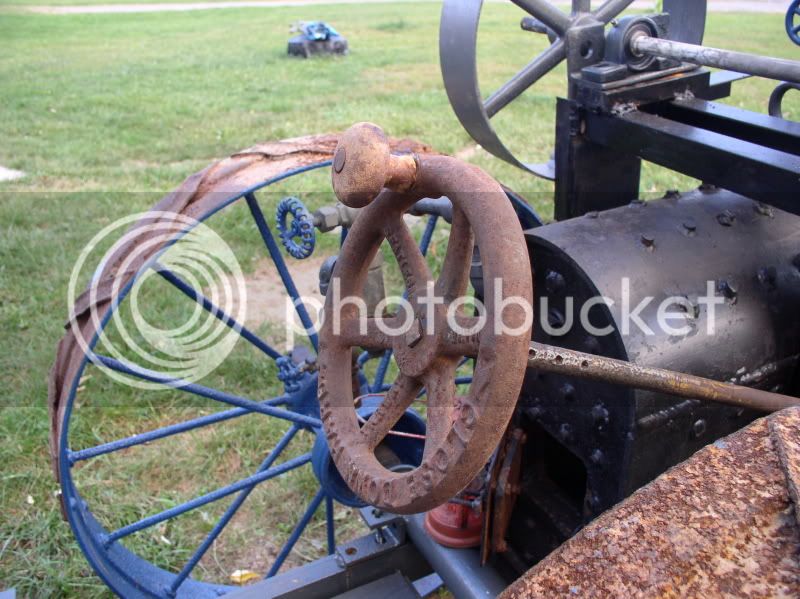
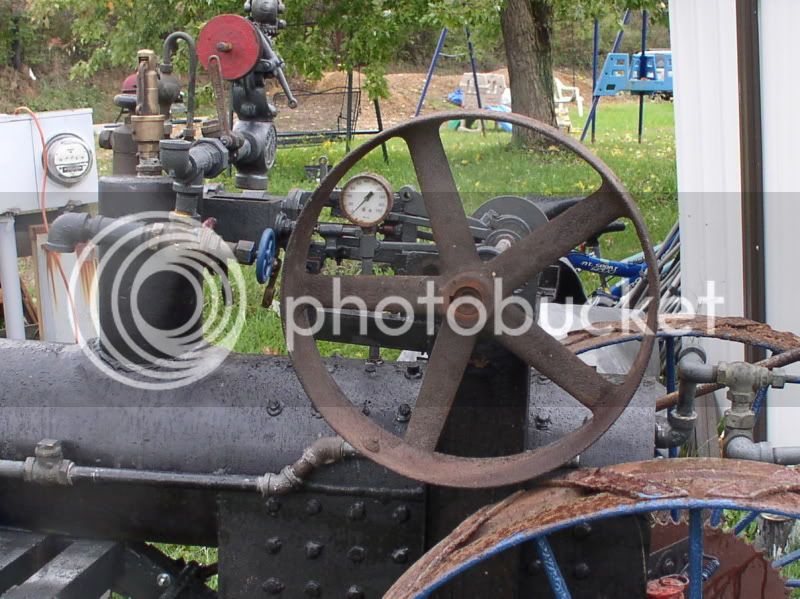
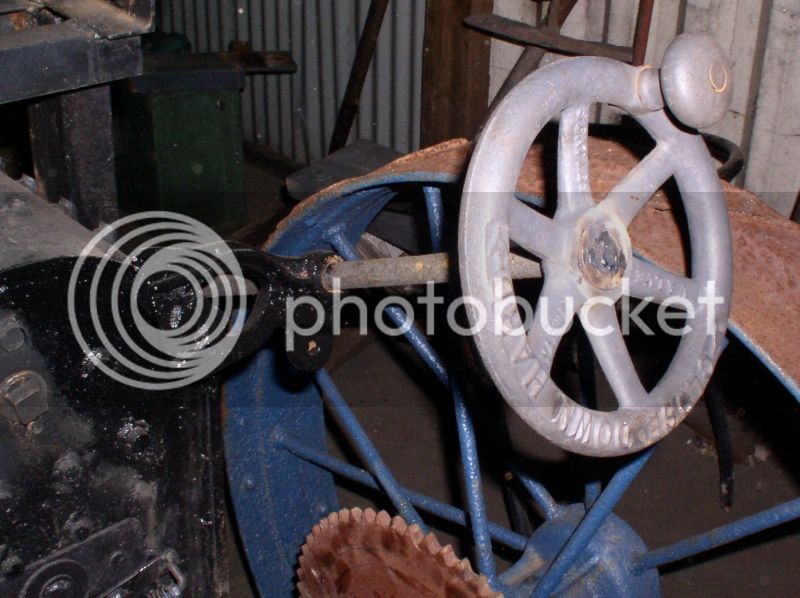
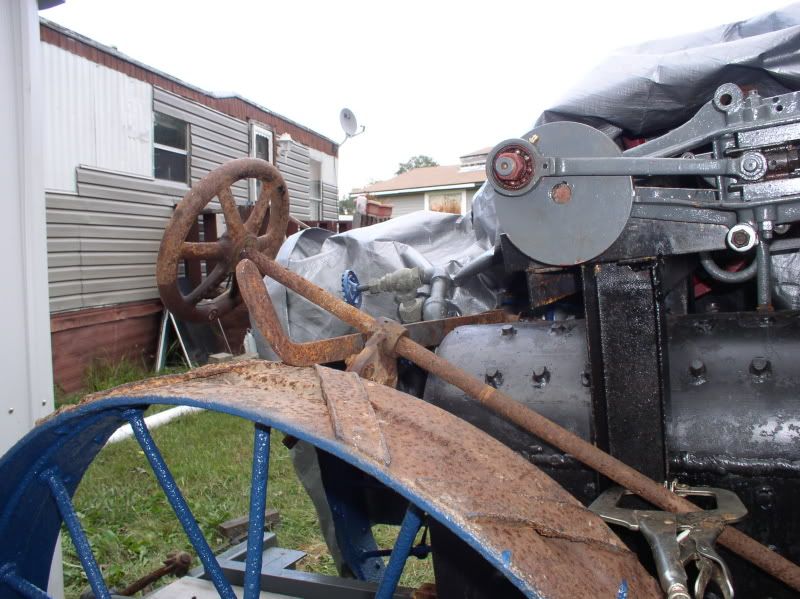
Which brings us to adaptive re-use. I needed a steering wheel. I could have gotten a fancy model casting from someone selling kits. Or I could have made drawing and fabricated one from bar. Instead I found this large valve handwheel in another flea market for the princely sum of $5. About the right size, all it needs is a steering knob, and the lettering ground off. I made it fit the shaft by simply squaring off the rod by eye with an angle grinder. If I get ambitious I'll put in a set screw or maybe I'll just peen the end of the shaft to hold it. Is it perfectly true? It's closer than you'd think..... and perfectly serviceable.
P9120005.jpg


Back to the salt mines....
 
Allen this is exactly how I build my large radio controlled cars using bits and pieces from the scrapyard.

Find a couple of key components and "work around them".


The visualization stage is good, but I always spend a lot of time at the mock-up stage, and there never seems to be enough clamps and little blocks of wood to prop everything up with.


all it needs is a steering knob

I'd look for a place that services large machinery and see if you can get a ball from an old ball bearing for a steering knob.
;)


Awesome. I love adapt, recycle, reuse and use it if fits / works. Thm:

Looking great. Keep those photos coming.
 
Is there anything more frustrating than knowing EXACTLY what you want to do, how to do it, where to get it.... and not even having GAS MONEY to get there?......

Meanwhile, I put the steering chains on today.
P9140002.jpg


And then I piped most of the steam line. Yes, I need new governor weights and springs from Mr. Woodworth, but they'll have to wait for me to find $50...
P9140003.jpg


And for $4 Kim couldn't resist
P9140001.jpg
 
Some progress pictures,

Steering gear - I don't think it needs a lower support below the worm, but we'll see.
P9250008.jpg


The knob is from a Case L tractor. Yes, it's oversize for a model, but the size works well with Kim's malformed hand.
P9250007.jpg


The factory Mason engine's Stephenson reverse... It LOOKS spindly because it was designed for high speed. But it will do the job.....
P9250005.jpg


I tried this flywheel for size. I don't think I'll use it because the rim is cracked around one of the spokes. I need to find one about 15-16" x 4" wide
P9250004.jpg
 
Allen said:
Steering gear - I don't think it needs a lower support below the worm, but we'll see.

AHAHAHAHAHAHAHA...nothing like loosing control of a steam-roller. Warn the neighbors. Rof}
 
Honestly? I think a tooth would break before the 3/4" shaft flexed enough to jump the mesh.... And there are springs on the ends of the chains to absorb most of the small shocks and jars. Besides, how "out of control" can one get at <3MPH?
 
Great project, looks like the real thing. But you need to plant some more zucchini so you will be able to finish it.
Mel
 
winklmj said:
No way. Just stickpoke I think it's looking great.

Several neighbors have already gotten the bright idea that I'm going to roll their driveways when it's done....... just to 'test it, mind.

Guess I need a couple brass plaques that say "Not for Hire".... wonder if they'd understand if it said "Ná Fostaítear", instead? ;D
 
Score! :big:

Today was a very busy scrounging day. I found a 16" x 4" flywheel for $15, a pair of 16" #80 sprockets that will work in place of bull gears for $5 each, and a pair of matching (#80) 10 tooth pinion sprockets for $11/pr... now I just need to find about 10 feet of half decent used roller chain, cheap.

Jury is still out on whether the primary drive will be chain or gears. I'm figuring I need +/- 20:1 total reduction to get 3-3.5 mph at 300rpm.... the final drive reduction is a bit less than 6:1 (I think I counted 58 teeth on those big sprockets)... so roughly 3.5:1 plus a pinion clutch? on the primary.... My brain is fried at the moment. But I'm happy

Ed Phillips preparing one of my $5 sprockets for boring out to 2".
PA020027.jpg
 
Some pictures - I just sort of slid everything together because it was starting to sleet :-[

New flywheel.... looks real good as long as nobody gets the bright idea of hanging a too heavy belt on it.
PA050003.jpg


Bull sprocket installed. Pinion sprockets haven't come yet... about 10 feet of #80 chain will have to wait for another payday or two.
PA050002.jpg


Left side after minor frame adjustment - no more weird geometry.
PA050001.jpg
 
The half Mason came from the consignment area at the Cabin Fever Model Engineering Expo in York.... for something like $800 back around 2002. I got it at the end of the show. Quite possibly no one else wanted it because it was the 'wrong' half. I assume the previous owner used the other half. The valve gear came from another partial 'wrong' half Mason that I got from feebay for $500, removed the valve gear and resold the rest at Cabin Fever for $450..... (It would cost more than $50 to fabricate the link, hanger, and rods, so I thought that was quite acceptable)

The bore is 2-1/4" the stroke 3-1/2" on these, which makes them about perfect for small traction engines and shays, and small enough collectors and hoarders don't need a forklift to move them. The LEAST expensive complete Mason I've ever seen was $1200 (when I was flat broke, of course) They are usually $1800+........

IIRC Mason built engines for both Stanley and Locomobile, plus others The twins were rated at 10HP or so at some crazy pressure and rpm.... not sure what this one was in.

While we are on the subject of sources and costs, the code materials alone for the boiler were $1100 back in '97. The governor came on an engine I resold without it at a profit, otherwise it would have been about $400. The injector I got for $125 at the Coolspring engine show in the mid '90s - they are about $300 today. The front roll came from an estate auction down near Pittsburgh for $25 plus $10 for a big burly lad to help load it. Much of the rest came from friends' scrap piles for a nominal sum. If I had to pay retail, I'd not be able to afford all this in 40 more years....

Yes, I know, I'm not really 'machining', just fabricating.... humor me, my lathe and mill went for bills after the big 'D' ....... and I've noplace to put any here. :-[
 
Success! and/or failure.....

Tried a test fire on the boiler last night. After 2 hours I got up enough steam (about 10psi) to toot the whistle before the 3/4" tubes plugged up with a bunch of nasty tar stuff. (What I get for firing on scrap 2x4s - even dry rotted ones, I guess.)

It simply doesn't draft nearly as well as I'd like - especially when cold. We'll try using a compressed air hookup on the blower pipe to force the draft. If that doesn't work I'm probably going to have to replace at least half the tubes with 1" ones (which will involve dismantling a bunch of stuff to pull the boiler again.... and getting a heavier hand drill)

PA100001.jpg
 
Just to bring this up to speed...

New governor weights and springs installed. New larger pressure gauge acquired and installed.

3 pinion sprockets acquired. Final drive chains acquired. heavy angle to support differential shaft onhand.

110v steamup fan given to me.

110v stick welder acquired ($40!), needs a cooling fan installed and new plug before I try it.

Weather expected to start going to crap soon. Probably about time to mothball it until spring.
 
Allen, I love it!

Great work - are you planning on firing totally on wood or will you need something with more energy in it to get the required heat?

Nick
 
The small tubes don't like soft woods or the local soft coal. It's looking like hardwoods (allywood aka oak pallets, etc) and lump charcoal.... perhaps with anthracite or coke mixed in.

I thought about making a kero/diesel burner but I haven't found a decent gravity feed design for a long skinny firebox, yet.
 
Pat J said:
.....
We want to see it run.

Can you post a video?

If it quits raining I'll see if I can't at least get a vid of the engine running on air next week.
 
No this isn't a "zombie topic".... I just FINALLY got around to some progress pics. If it doesn't look like I did anything for a year (or two), it's probably because I really didn't get much done on this last summer. (I scrounged some more parts, but that was about it. Blame it on negative cash flow)

Since our new landlord was being a pain in the butt about it anyway, we had a friend haul it to the Portersville Pa steam show grounds. It will be on display in the steam building there during the summer show for those who are interested in examining it. Nothing like an "open house" to motivate you to get to stuff you've been procrastinating about. Anyway, to the pix!

A minor project, but it needed doing. I made a bracket to hold up the inside end of the lift for the Stephenson's link reverse. It's just a bit of bar with a bushing welded to it - on the original Mason twin, this part was cast in on top of the other engine frame. It took me a while to figure how to do the offset without it looking totally cobbled. A diagonal brace will get bolted to the hole and further help hide the joint
P1010008_01.jpg


This photo shows the end result of about 10 hours work just to get things back looking almost exactly how they did before I started.... I never liked the way that the front end sat higher than the rear (I mis-measured the offset needed on the frame when I built it, and didn't notice until the boiler was already mounted. Lesson learned!) Since I couldn't lower the front without a LOT of reworking because of all the stuff that would need removed, I decided it would be "easier" to relocate the rear axle. All I had to do was cut about 1-1/2" reliefs into the channel frame on each side, make sure everything was square, and weld it all back together. The boiler sits within about 1/4" of level now..... Oh, the things we do just for aesthetics. LOL
P1010009_01.jpg


While I had the welder out, I (hopefully) permanently mounted the steering gear. Since the recycled 3/4" shafting was a little sprung, I decided a center guide might be a good idea. If it LOOKS like a 3/4" bushing welded to a 3/8" bolt... it probably is. Sometimes the simplest solution is also the most elegantly functional.
P1010007_02.jpg


I'm not sure what this old casting came off of, but I just had to use it for the upper steering bracket. And rather than peen the wheel in place, I welded a washer to the shaft. Just in case I ever need to disassemble it. (Yes, I considered cutting the seat deeper then threading the end of the shaft, but the wheel has very little dish.
P1010010_01.jpg


I have most of the parts for the driveline (differential, pinion clutch, etc), and the drawings made for the water tanks, but those things will have to wait for another post....
 
Back
Top